Master sash chain connector installation with our 2024 guide. Step-by-step instructions, essential tools, professional tips & troubleshooting for flawless window hardware setup. DIY success guaranteed!
Основные выводы
Proper installation of a sash chain connector is fundamental for the smooth, safe, and long-lasting operation of your double-hung windows. This section highlights the core preparatory steps and critical considerations before beginning the physical installation process. Ensuring you have the correct tools readily available is paramount; attempting the job without them often leads to frustration, potential damage to the window components, or an unsafe final result. Equally important is understanding the precise role of the connector within the window balance system and the necessity for meticulous alignment during fitting. Taking the time to thoroughly prepare the window frame and hardware, clean the track, and verify the condition of the existing sash chain and counterweight will prevent common issues later. Accuracy in securing the connector directly impacts the window’s balance and ease of movement.
Always disconnect the counterweight or balance system and securely support the window sash before removing or installing any hardware to prevent unexpected drops and potential injury.
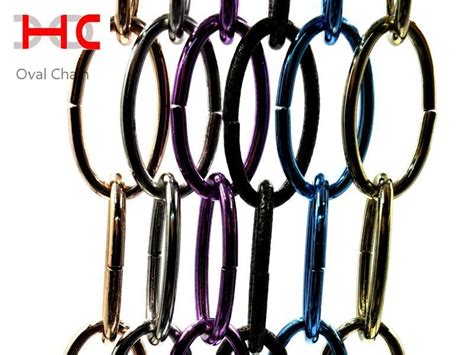
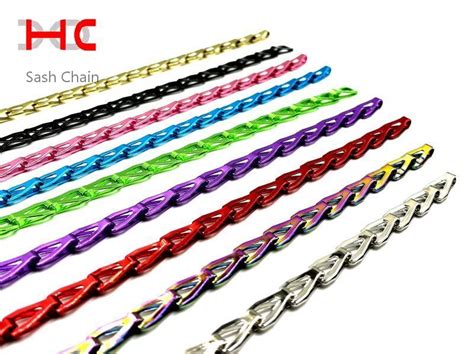
Essential Tools for Sash Chain Setup
Proper installation begins with gathering industry-recommended equipment. Having the correct tools ensures precise measurements and secure hardware attachment, directly impacting the window’s smooth operation. Essential items include a tape measure for determining chain length requirements, needle-nose pliers for handling small connectors, and a Phillips-head screwdriver compatible with standard hardware screws. Additionally, a spirit level guarantees vertical alignment during mounting, while a cordless drill significantly accelerates the fastening process. Consider these supplementary items for enhanced efficiency and safety:
| Tool Category | Primary Function | Special Considerations |
|---|---|---|
| Measuring Devices | Verify chain length & positioning | Use steel tape for precision |
| Fastening Tools | Secure screws and brackets | Magnetic tips prevent screw loss |
| Adjustment Implements | Bend and position metal components | Insulated grips recommended |
| Alignment Aids | Ensure vertical/horizontal accuracy | Laser models increase efficiency |
| Safety Equipment | Protect during installation | ANSI-rated eyewear is essential |
Work gloves prevent hand injuries from sharp hardware edges, and protective eyewear shields against metal fragments. Professional installers consistently emphasize calibrated tools to avoid measurement errors that cause binding. With these prepared, the subsequent installation steps proceed efficiently while minimizing adjustment needs.
Step-by-Step Installation Guide
Begin the physical installation by ensuring you have all necessary tools and components readily accessible. First, carefully position the sash chain connector onto the designated mounting point on the window frame or sash, aligning its holes precisely with the pre-drilled pilot holes. Hold it firmly in place. Using your power drill fitted with the correct size Phillips bit, drive the provided stainless steel screws through the connector’s holes and into the pilot holes. Apply steady, moderate pressure while drilling to ensure the screws seat fully without stripping the heads or over-tightening, which could distort the connector. Work sequentially, typically starting with the top screw, then the bottom, checking alignment after each screw is partially seated before fully tightening. Confirm the connector sits flush and secure against the surface without any rocking movement. This solid foundation is critical before proceeding to connect the actual chain. Ensure the mechanism operates freely without binding at this stage. Next, we will focus on preparing the associated window hardware components for connection.
Preparing Your Window Hardware
Thorough preparation of the window hardware forms the foundation for a successful sash chain connector installation. Before handling the connector itself, carefully inspect the window frame, sashes, and existing hardware. Ensure the channels or grooves where the chain will run are completely free of accumulated dirt, old paint fragments, or any debris that could impede smooth movement. A clean, dry surface is crucial for proper adhesion if adhesive-backed components are involved or for ensuring mechanical fasteners grip securely. Check the compatibility of the new sash chain connector with your specific window type – whether double-hung, single-hung, or another configuration – and verify the condition of the pulleys or guides at the top of the frame; these must rotate freely. Accurately measure the required chain length needed for the full travel of the sash, allowing a slight tolerance for adjustments later. This meticulous preparation phase prevents misalignment, binding, and premature wear, setting the stage for the subsequent steps of securing the connector correctly. Always prioritize safety by ensuring the window sash is adequately supported during this process.
Securing the Connector Correctly
Once the sash chain connector is correctly positioned against the designated point on the window frame, as determined during the preparation phase, secure it firmly using the appropriate fasteners. Typically, this involves utilizing the provided screws or bolts, ensuring they correspond to the material of your window frame (wood, vinyl, aluminum). Drive the fasteners through the connector’s pre-drilled holes directly into the frame using a screwdriver or drill with controlled torque. Avoid overtightening, as this can strip the holes or deform the connector; aim for a secure, snug fit where the connector cannot wiggle or rotate. Crucially, double-check that the connector’s pivot point or attachment loop is oriented precisely as specified by the manufacturer’s instructions to ensure proper chain engagement and smooth operation within the counterbalance system. This precise fastening is fundamental to prevent future slippage or misalignment that could impair window function.
Pro Tips for Perfect Alignment
After securing the connector, achieving precise alignment is critical for smooth, friction-free operation and long-term hardware integrity. Consistent spacing becomes evident when the chain runs vertically without any noticeable bowing or lateral pull towards either side of the window frame. Employ a plumb bob or laser level dropped from the top pulley position to verify true vertical alignment; this simple check prevents cumulative binding issues over time. Ensure the chain maintains a slight, consistent tension – it should not hang loosely nor be pulled taut. A gap of approximately a quarter-inch between the chain links and the pulley groove is often ideal, allowing free movement without excessive slack. Visually track the chain’s path during a test operation; any deviation or rubbing against the frame indicates misalignment requiring adjustment of the connector position. Proper alignment minimizes wear on both the chain and the pulley, significantly extending the lifespan of the entire mechanism.
Troubleshooting Common Issues
Even with careful installation, occasional challenges may arise with sash chain connectors. Identifying and resolving these promptly ensures smooth, safe window operation. A frequent concern involves chain slippage or detachment from the pulley. This often stems from insufficient tension or an improperly secured connector end. Verify that the chain is taut enough to lift the sash without excessive slack and that the connector is firmly attached to the chain link and the sash lift point, using the correct fastener type for your hardware. Misalignment is another common culprit, leading to jerky movement or binding. Revisit the pulley alignment relative to the sash weight pockets; minor adjustments often resolve friction points. If the window feels unusually heavy or struggles to stay open, confirm the chain’s load rating matches the sash weight. Exceeding capacity risks failure. For persistent operational resistance, inspect the entire run for obstructions within the weight pocket or track and ensure all moving contact points are lightly lubricated with a silicone-based product, avoiding oil-based lubricants that attract dirt. Addressing these points systematically usually restores reliable function.
Final Checks for Smooth Operation
Following the installation and any necessary troubleshooting, performing final operational checks is essential to guarantee the sash chain connector functions correctly and safely. Begin by slowly raising and lowering the window sash through its full range several times. Observe the movement closely; it should be consistently smooth, without any unexpected hesitation, jerking, or grinding noises that might indicate binding or misalignment. Pay particular attention to the point where the chain engages and disengages with the connector, ensuring positive engagement without slippage. Verify that the counterbalance system effectively supports the sash weight at all heights – the window should stay securely in place when partially open without drifting. Visually inspect the entire path of the chain and connector, confirming there are no obstructions, kinks in the chain, or loose hardware components that could interfere with operation or create potential snag points. Finally, ensure the window locks securely and aligns properly within the frame when fully closed. These final verifications confirm the reliability of your installation and prevent future operational issues.
Ensuring Long-Term Performance
Beyond initial setup and immediate problem-solving, guaranteeing the extended functionality of your sash chain connector hinges on consistent preventative maintenance. Regular inspection, ideally every six months, is paramount. During these checks, meticulously examine the connector for any signs of wear, such as elongation of links, deformation, or corrosion, particularly if exposed to humidity. Gently wipe down the chain and connector track with a soft, dry cloth to remove accumulated dust and grime, which can impede smooth operation and accelerate wear. Annually, apply a minimal amount of silicone-based lubricant specifically designed for window hardware to the chain links and the pulley wheel; avoid petroleum-based products as they attract dirt and can degrade certain materials. Verify that all fasteners securing the connector remain tight, as vibration over time can cause loosening. Addressing minor issues like stiffness or slight misalignment promptly during these routine checks prevents them from escalating into major failures that compromise window operation or safety, ensuring your hardware delivers reliable performance for years. This proactive approach aligns with industry best practices for window hardware longevity.
Заключение
Having covered the essential tools, step-by-step installation process, alignment techniques, and troubleshooting strategies, you now possess the comprehensive knowledge required for a successful sash chain connector installation. This guide has equipped you with the understanding to handle the nuances of positioning, securing, and testing this critical window hardware component. The precision applied during setup directly influences the long-term reliability and smooth operation of your window system. Remember that achieving initial smooth movement is a key indicator of correct installation, but maintaining this performance requires periodic inspection and adherence to the outlined maintenance practices. With careful attention to detail during the final checks and adjustments, your DIY project results in a durable, high-functioning window mechanism that operates reliably for years to come.

Вопросы и ответы
How often should sash chain connectors be replaced?
Typically, connectors last 10-15 years with normal use. Inspect annually for wear like stretching, rust, or deformation indicating replacement is needed sooner.
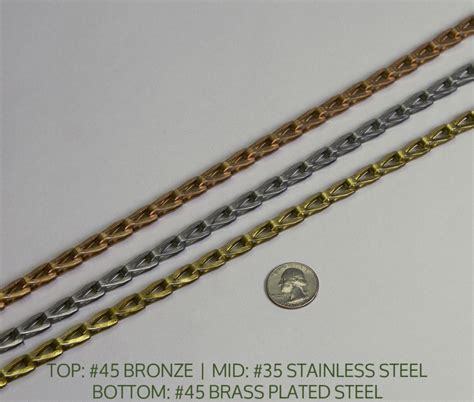
Can I use any chain type with my window connector?
No, compatibility is crucial. Always match the chain material (typically brass or stainless steel) and link size precisely to your existing counterbalance system for smooth operation.
What causes a sash chain to detach after installation?
This usually stems from improper securing at the pulley or connector pin. Revisit the “Securing the Connector Correctly” section, ensuring the retaining clip is fully engaged and the chain end is seated firmly.
Regarding alignment, why does my window still stick slightly?
Even with correct initial alignment, minor friction points can exist. Apply a tinyamount of silicone-based lubricant to the chain within the track, avoiding oil which attracts dust. Recheck the “Pro Tips for Perfect Alignment” steps.
Is it safe to adjust the counterbalance weight myself?
Significant weight adjustments require recalibrating the entire system. We strongly recommend consulting a professional if the window feels excessively heavy or unbalanced, as incorrect handling poses risks.
What’s the maximum window weight these connectors handle?
Standard residential connectors generally support windows up to 60-70 lbs (27-32 kg). Always verify the specific weight rating of your hardware; exceeding limits compromises safety and function.


